Little things go a long way. Just by painting the front door and adding a couple finishing touches my house feels a lot more homey!

Little things go a long way. Just by painting the front door and adding a couple finishing touches my house feels a lot more homey!
Holy moly.
This was the biggest, most time consuming, and most expensive project yet. It also makes the biggest impact, so I’m sure those two go hand in hand 😉
Usually we can crank out projects pretty quickly, but I would have to say since buying the materials and finishing the project it took about a month to complete. But just wait until you see what was all accomplished!
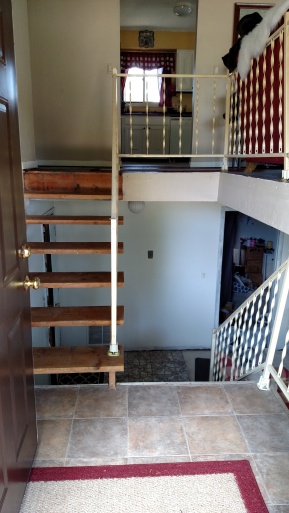
So back when we bought the house it looked like this:
-2")
-3")
-4")
-7")
-8")
-9")
-10")
Amazing, right? ;P
The carpet on the stairs obviously had to go. The railing was falling off and not up to code. We knew we had to (and wanted to) change this all eventually, but we also knew it would be a BIG project. It took us 9 months to get around to this. In my mind that is slow, but I also have very unrealistic expectations (at least that’s what my husband says)
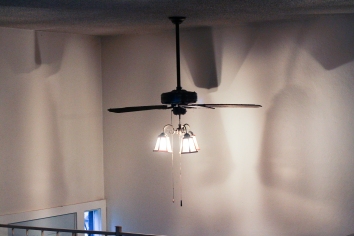
Also do you see how this original light is hanging by exposed wires? Look closely.

That’s safe…
After taking off the carpet (which was a painfully long process) we lived like this for a while:

It was enough to make me feel sad every time I walked up the stairs haha. Your entry way is the first thing people see and I wanted it to be a nice impression. Especially since the rest of the house looked nice. Well besides the basement. But don’t look down there. IF YOU DON’T LOOK IT DOESN’T EXIST!

So after deciding to go for it we got all the materials and $$$ poorer.
We got everything from Menards, our favorite place.
It took a long time of debating to figure out what we really wanted as an entryway and staircase. Bookshelves? Half wall? We went with both. We wanted to do a half wall because I like when you have a separate area to stop and take your stuff off before entering the home. I love having the bookshelves as well. Now Titus has a designated spot to put his keys and wallet without feeling like we’re playing hide-and-seek with them every morning 😉
But once we decided…off went the railing and posts!


Don’t get too close you might fall down. Not speaking from experience or anything…

Titus cut everything for me first so I could paint while he worked on the half wall.
Shout to to my husband for being an insanely patient man with all of my “actually, I want to do this instead…” and for being a diligent, hard worker and good looking handyman! 🙂


We painted the risers and posts a whiteish cream, the same color I’ve used throughout the house for the hutch, chairs, kitchen table, and fireplace. We stained the treads and railing and landing post the same color as our floor and kitchen table. I liked being consistent with the colors around the house.


Making progress and….
DONE!

Is this even the same house? Let’s take a closer look…


I probably could have dusted off the stairs first…but o well!
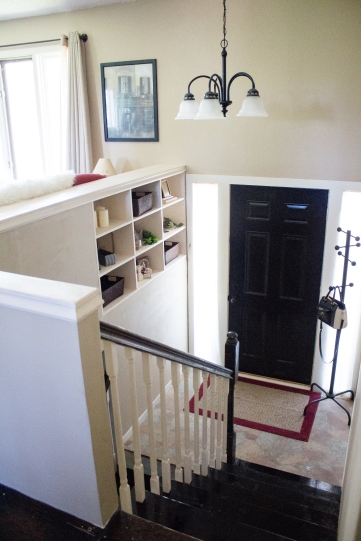


Good thing I posted this picture because it reminded me I need to fill those picture frames… 🙂
Here are some before and afters:

")
")
-9")
")
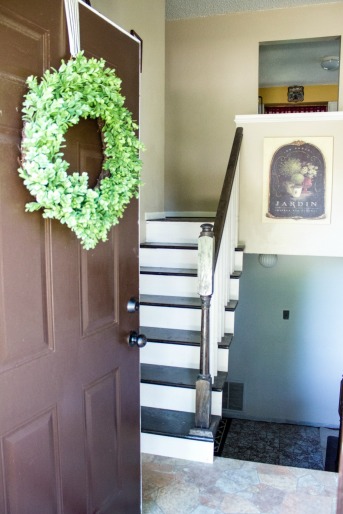
Besides the whole staircase and entryway remodel, I also repainted the interior door black and switched out the floor.
Man o man, what a project but so worth it for this split level entryway and staircase makeover!
xoxo
One night at 8:30 pm I got this sudden urge to paint my garage.
So I went to the store, got some gel stain, and went to work!
Our house started off like this when we bought it:

Not bad by any means. But not exactly what I was wanting in curb appeal either.
I wanted to take those “pie slices” ( as I call them) off the garage and follow the brown theme throughout the house and brick.
I used this stain that I used on the mantle and voila!


It’s looking classy! Notice that those pie slice windows on the garage are off? I also found carriage door accessories that I couldn’t wait to try out but they are LOST! For the life of me I can not find where they are. They were $30 so I’m not going to buy another one, but bummer….
Missing report: if anyone knows where I put them give me a ring. This is what they look like for those that are curious

The landscaping is kind of in that awkward stage where you’re waiting for grass and plants to grow…but I’m really happy with how it is looking in such a short amount of time!
If we were doing more house projects soon (even though we’re not, we took a pact), but IF we were…I really want to do some shutters and an awning/portico!
Maybe one day. But until then…xoxo

-3")
We are very blessed to have not one, but two guest rooms in our house to redo and make pretty for our friends and family to stay the night! Our first guest room we did is a yellow and gray cheery room. This room we lovingly refer to as the beige room. It’s need a better name though. How about…beautiful beige? Neutral simplicity? Hmm…
It just occurred to me that maybe I don’t need to actually name my rooms and maybe just crazy people do that….
Anyways, I only have one “before”, but it’s all you need.
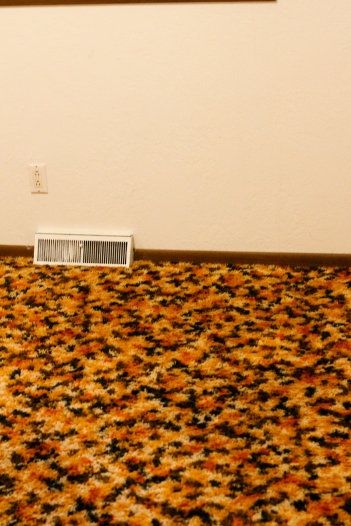
Wow! Look at that carpet! What is it with the 70’s and wildly…..creative carpet?
Bye bye carpet and hello beautiful beige room!


Oh, side story about this mirror. Winston is NOT allowed in this room (or any room) because every time he sees himself in this mirror he scares himself and pees. It’s kinda funny, kinda cute, kinda dumb. You’d think after the first time you’d understand it was yourself!
Well now we close all the doors to every room and are very strict about our puppy’s whereabouts. Just practicing for kids, ya know?
xoxo
Now I know why everyone wants to redo their fireplace!
I didn’t hate my fireplace before, but I didn’t love it either.
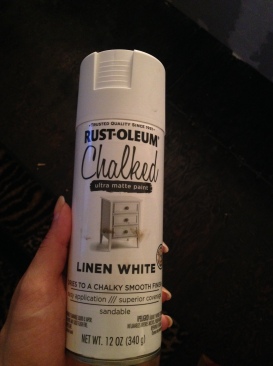
When I was at Menards a while ago trying to find some supplies for a current project we were working on, I got sidetracked and found some chalk paint spray paint. I love spray paint and I hear so much about chalk paint, so I picked up a couple bottles with the idea of re-doing my fireplace mantel in mind. And I picked up a pink one, for no reason other than I really like pink.
Let’s take it waaaayyyyy back to what it looked like right when we got the house:
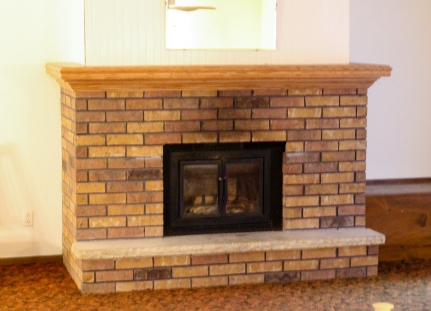
I guess now that I see this picture I should have been wanting to change the fireplace ;P
But it didn’t look that bad after we fixed up the living room a bit a couple months later in the fall:

But it all started with the mantle. First I did the mature, responsible thing and covered anything that shouldn’t have paint on it.

Then I used a white chalk paint and did a couple coats.
I didn’t think it looked “chalky” and I wasn’t a huge fan of the stark white

So I took some brown gel staining and rubbed it on the mantle with a cloth. I love this gel stain! I also used it on the garage. More on that later.


Ta da look at that mantle!
I took some creamy white paint that I’ve used on the hutch and the dining room chairs.

I mixed the paint with equal parts water. Basically I just mixed it until it looked good and liquid-y.
Tip: When painting your fireplace, the best way is to paint it over the brick with a paintbrush, then blot it with a cloth. All the blogs I read said it took forever. I really didn’t think it took that long, maybe an 1 hr 30min for the whole thing. But I also had to be somewhere, so that deadline could have helped.
Don’t just paint over the brick, because it won’t look as natural. Unless that’s what you’re going for…
But don’t just blot it either, unless you have 6,000 years to paint the fire place. Unless that’s what you’re going for….
Here it is! It gives it a french country look.

What a difference! After painting it I didn’t realize how dark the room looked before. Since I have so many rich colors in this room I didn’t want it to always look like Christmas. Having it white gives it an all around season appeal.
I’m still playing around with the mantle and seeing what decorations I like…maybe simple is better!
Let’s look at the before and afters again

-3")
-3")
")
-3")
xoxo
I call this room the Sunny Delight. Well I didn’t until now but it’s a good name. We just refer to it as the gray and yellow room. How exciting.
I love this room especially because of all the natural light. It has 2 windows and man, that makes all the difference. If/when kids come along I think this might be the nursery room. All the natural light makes it feel cheery.
But this is what it looked like first:
")
")
")
Now I have to do a disclaimer and say I didn’t take the “before” pictures. But I’m not going to point any fingers and say who did.

What?? How did this picture of my adorable husband get here?
😉
Anyways, even in the limited scope you get the idea. Don’t barf looking at the carpet. Actually if you did, it’d probably blend in.
Thankfully, here’s what it looks like now:


xoxo
My love for drop cloths knows no bounds. Is that how the saying goes? Originally I started off with this floral loveseat. At the time I couldn’t decide if it was ugly or cool. Hm I still don’t know.

Then I took a simple drop cloth and draped it over. Tada!

Before update
I really liked how it looked then and it worked. But I’ve been bit by the decorating bug! I don’t know if it’s the flowers and the sun, but I’ve been wanting to change things up a bit. We are currently under a HUGE project right now, so anything new I did had to be extremely cheap or free. Okay, so free.

project spoiler
Plus the whole draping thing didn’t work anymore. Winston thought it was fun to get stuck underneath it. Extreme dog lovers will think this is cute. Non dog lovers will be glad they don’t have one. You know who you are.

O? And who’s Winston? Newest addition to our family! He’s a 4 month old puppy, and he’s a retriever/terrier/lab mix.

Currently he just peed in the house so I put him right outside (potty training 101). Sometimes I think he pees just so he can go outside. Not this time though. He’s doing a pathetic bark/yelp like someones hurting him because he wants to come inside. O please Winston, you’re fine. I’m halfheartedly shouting out “no” through the screen door but I don’t think it’s doing anything. He and I both know I’m going to come get him soon so we don’t become that family on the block.
It’s like Winston knows exactly what will irk me because every time I come into the living room he takes all the pillows off the couch. Why? WHYY???
But he’s not all frustration and annoyance. Sometimes he looks at you like this:

And wants to join in on family prayer time:

Anyways, this is a home post, not a dog post! (Maybe I’ll do one of those?)
So with a staple gun and a tug here and there this happened:


I love it! It looks so dainty and frenchy. I can’t tell you how I did it, because I don’t know how I did it. I just pulled and twisted until it looked good to me. Now, it looks like a place where you want to sit and have some tea. That’s a success to me.
xoxo
How secure is it? It passed the sit and talk test. But I wouldn’t have a pillow fight on it or anything.
Can you still wash it? In this version you can take the seat covers off and wash them. That’s probably all that’d get messy anyways.
Hubby & I decided we needed to take a break on a house stuff and start saving our money for future trips we want to take.
This is a little hard because I see so much I want to do, but also a good exercise for me to live in contentment and find all the things I like about our house now.
Even though our break has started (ish), I can use our break to catch up on projects that we’ve finished but haven’t had the time to blog. Truthfully, I’ll probably just have to get really creative and find ways to do projects without spending any money ;P
Recently, we’ve finished our master bathroom. Before it was pretty much a nightmare. But if I’m thinking positively, how lucky are we to have a bathroom in our bedroom that is just ours!
Back to the nightmare though.
Ugly carpet…in a BATHROOM…gross! Blue tub. Blue sink. Straight out of the 70’s. Just to name a few things.

Now it fits our brown and gold bedroom and feels a bit dreamy.
")
")
The ugly carpet got ripped out for a clearance white and gold linoleum.
")
")
Rustoleum’s Tub and Tile paint proved to be a winner once again by painting the blue tub and this time the sink too.
")
")
")
")

Drop clothes are so, so amazing and here’s the curtain I was talking about. They also work for chair covers and slip covers.

The tall “shower curtain” is a cream sheet elevated to the ceiling using a tension rod. There is a curtain rod behind it that hangs a shower liner. All the warm, creamy colors create such a nice atmosphere when the sun shines.
Having this bathroom done is great because I use it not once, but multiple times a day and it’s so nice to feel happy every time I walk into it!
xoxo
Many people don’t know what to do to decorate at the end of the hallway. It’s too small to put a table or a plant, but it also looks too bare to have nothing. I know I struggled with this. Man, the dilemmas of life.
Though probably not original, I found the perfect solution for us. Shelves of family pictures!
Here’s a way before, right when we bought the house:

I’m so glad that I’m chronicling this progress. It’s so nice to go back and and see how far we’ve come in what…4 months!! On a budget?! In the words of my husband, “Wow, our house was really ugly.” Honesty, folks.
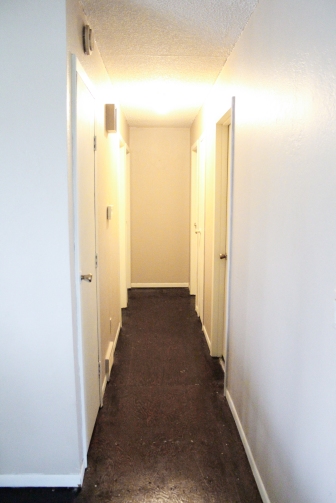
This was after painting the trim, walls, and doing a rustic floor. Wayyy better. But still kinda blah. Kinda boring.
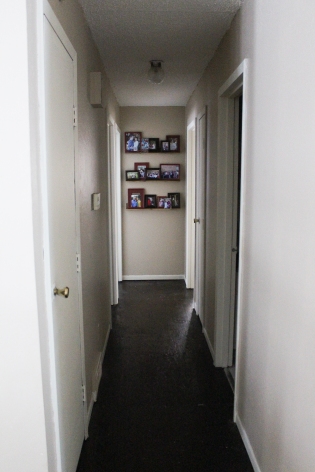
Doesn’t that just fill it in so nicely?
The shelf DIY-ing process:
The shelves were made from old pallets, no pictures for that though. I really should get better at that…
Old picture frames found at Goodwill and spray painted. See, spray paint cures all.


I ran out brown spray paint on accident, so I had to make up with some red I had laying around. It was a happy mistake because I love the mix-matched look.


-2")
-2")

xoxo
I just love it when you finish a project and you’re in love with the result.
This dining room makeover was something I was really looking forward to because:
A.) We’ve never had a dining room before so how cool is that?
B.) I dreamed endlessly of a farmhouse table, a chandelier, and flowers in the middle.
C.) It was my view every time I would sit on my couch and it got a bit tiresome.
Thanks to Pinterest, I had a clear vision of where I was headed.
Farmhouse table. Chandelier. French Country. Shabby Chic.
Here are some before pictures taken right after we bought the house:
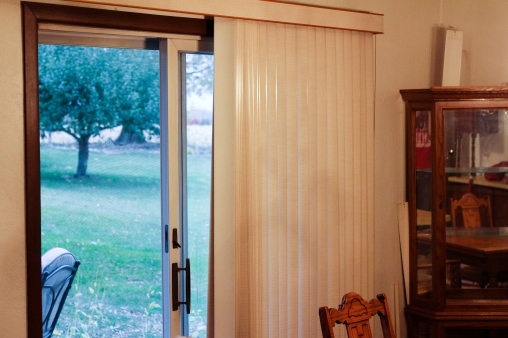
before
before
before
Even if you can look past the awful quality of the pictures (sorry, professional photographer here, though in my defense they were taken by my husband) there’s not much else to see.
We bought the table, chairs, and hutch set from the owner so those were left behind.
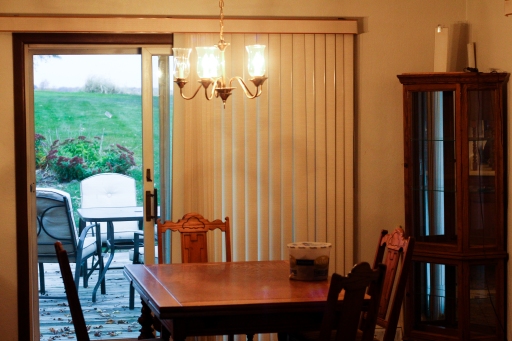
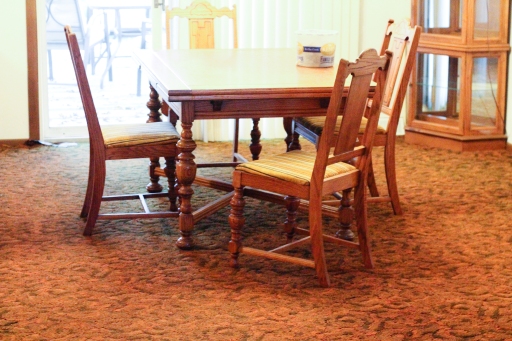
In the next picture we’re getting a little closer. It looks a bit homier but nothing like I really wanted. We tore out the carpet, stained the plywood, and added some rugs. We took off those apartment style curtains/shades and added in some gorgeous TJMaxx curtains with a DIY pipe curtain rod. Getting there.
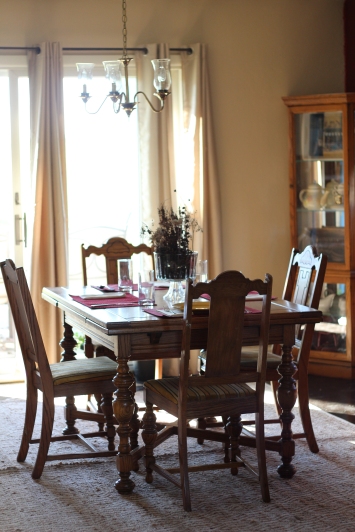
getting there
Then all of a week ago we finished it!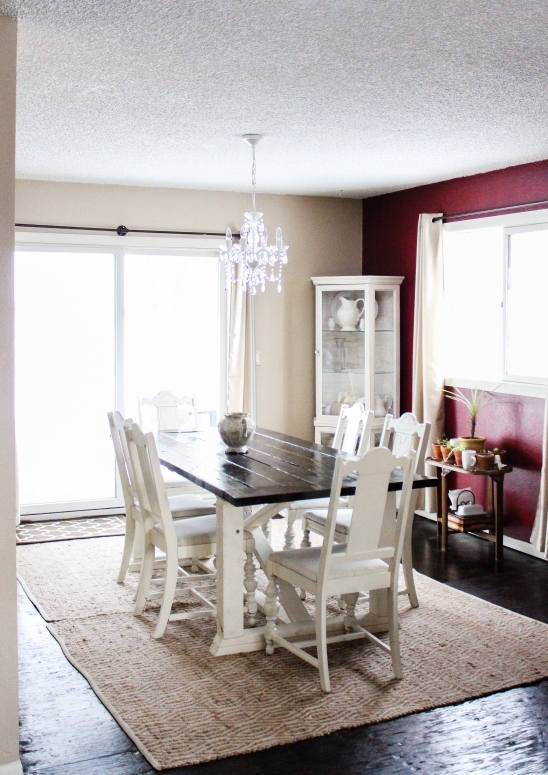
Isn’t she a beaut?
The table was built by my husband and I’m in love! We found free plans online, so we have no tutorial for that. I gave him a couple ones I liked and he kinda melded it into one.
The chairs got a makeover. The hutch got a makeover. Basically the whole room got a makeover.
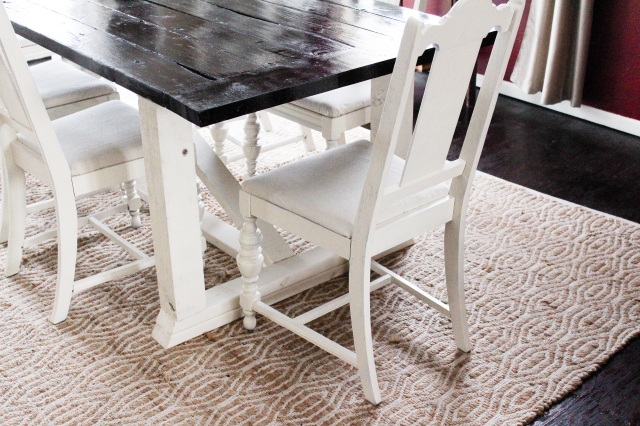

In the words of my sister,”this makes a good Instagram table.” Always thinking, girl, always thinking.

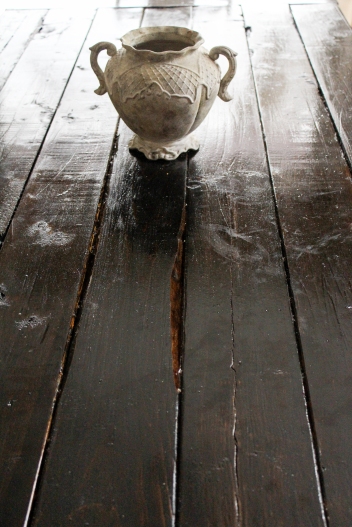
And I’ll end on this picture of pretty sparkles. How could I be Spoonful of Sparkles without it?? 😉
xoxo
